Product Detail
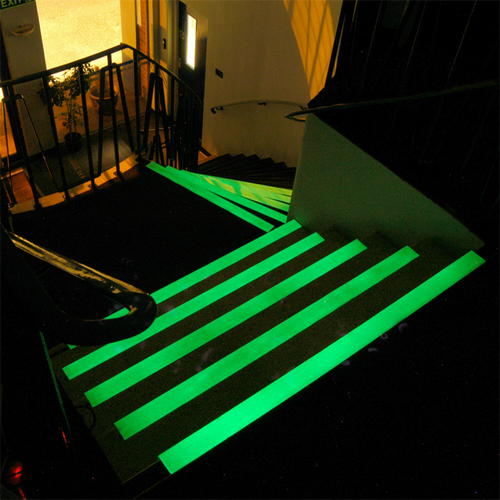
Make your steps instantly safer and brighter with our FRP Safety Edges. They are a virtually indestructible, slip resistant, fiberglass safety stair nosing. This anti-slip step nosing can be cut on site if required using a hacksaw or similar cutting tool. Provided in 4 standard lengths, it can be installed in minutes and walked on right away keeping downtime to a minimum.
Features and Benefits of FRP Safety Edges:
- Tough FRP base is resistant to stretching, warping and swelling
- Has a beveled back edge to minimize any potential trip hazard
- Instant safety extra grit surface
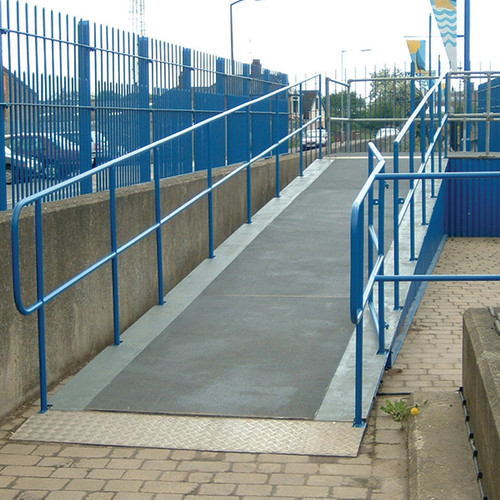
- Suitable for concrete, wood, brick, stone & metal
- Use for exterior applications such as steps or bleachers
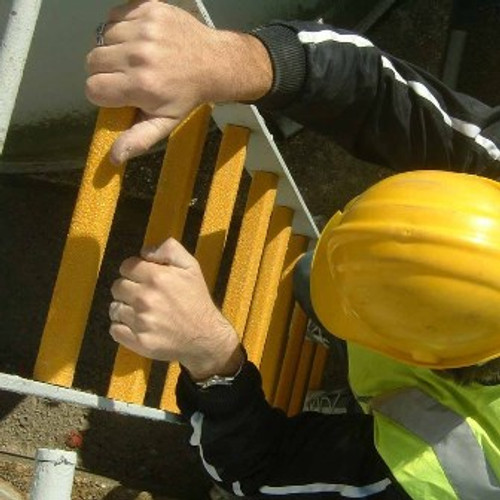
- Easy to install can be screwed or glued into place with Mastic Adhesive ChemLink M-1
- One tube of Mastic Adhesive is enough for 39 feet
- Available in 4 standard widths: 32", 36", 48", and 59" with 2-3/4 x 1-1/4 profile
Specifications
| Usage Interior/Exterior: | Interior or Exterior |
| Primer Required: | Optional |
| Suitable for: | Concrete, wood, brick, stone and metal |
How to Apply
Fix into place with screws or glue to a reasonably dry substrate with Mastic Adhesive ChemLink M-1. One 10 oz. tube of Mastic Adhesive will fit a standard caulk gun and will fix approximately 39 feet of Safety Edge FRP.
Surface Preparation: The surface should be reasonably clean and dry if the Mastic Adhesive ChemLink M-1 is to be the only means of attaching the FRP to the substrate. Badly damaged concrete should be repaired. The Mastic Adhesive ChemLink M-1 can tolerate minor imperfections in the concrete. If application is to damp, dirty, or to an unsound surface or the surface is very cold weather, use Mastic Adhesive to bed the FRP item into place and then supplement with screws. Install screws about 2 feet apart. Drilling through the FRP is easy using a standard twist drill suitable for wood or metal. Countersinking is not required. If you need to cut the FRP product, a good quality abrasive disc, jigsaw or hacksaw can be used. The FRP material is quite tough to cut by hand, so if power tools are not readily available, please ask about our cut to size service.
Screw Size Guide:
- To timber: No.8 x 30mm zinc plated or stainless steel screws.
- To steel plate: No.8 x 20mm self-tapping pan head stainless steel screws or No.8 x 20mm self drilling pan head Philips zinc plated screws.
- To concrete: No.8 x 30mm zinc plated or stainless steel impact anchors.
- To open mesh: Stainless steel or zinc plated saddle clips and domed head bolts suitable in length for the depth of the existing treads.
Application: Preposition the piece of GRP in place to ensure the fit. Trim if needed. Install screws about 6 inches from the ends of the piece, then additional screws every 2 feet as needed. Pre-drill the FRP to the proper hole size for the screws being used. Drill holes approximately 2" in from each edge and thereafter at approximately 12-16" intervals
Data Sheet
Make your steps instantly safer and brighter with our FRP Safety Edges. They are a virtually indestructible, slip resistant, fiberglass safety stair nosing. This anti-slip step nosing can be cut on site if required using a hacksaw or similar cutting tool. Provided in 4 standard lengths, it can be installed in minutes and walked on right away keeping downtime to a minimum.
Features and Benefits of FRP Safety Edges:
- Tough FRP base is resistant to stretching, warping and swelling
- Has a beveled back edge to minimize any potential trip hazard
- Instant safety extra grit surface
- Suitable for concrete, wood, brick, stone & metal
- Use for exterior applications such as steps or bleachers
- Easy to install can be screwed or glued into place with Mastic Adhesive ChemLink M-1
- One tube of Mastic Adhesive is enough for 39 feet
- Available in 4 standard widths: 32", 36", 48", and 59" with 2-3/4 x 1-1/4 profile
| Usage Interior/Exterior: | Interior or Exterior |
| Primer Required: | Optional |
| Suitable for: | Concrete, wood, brick, stone and metal |
Fix into place with screws or glue to a reasonably dry substrate with Mastic Adhesive ChemLink M-1. One 10 oz. tube of Mastic Adhesive will fit a standard caulk gun and will fix approximately 39 feet of Safety Edge FRP.
Surface Preparation: The surface should be reasonably clean and dry if the Mastic Adhesive ChemLink M-1 is to be the only means of attaching the FRP to the substrate. Badly damaged concrete should be repaired. The Mastic Adhesive ChemLink M-1 can tolerate minor imperfections in the concrete. If application is to damp, dirty, or to an unsound surface or the surface is very cold weather, use Mastic Adhesive to bed the FRP item into place and then supplement with screws. Install screws about 2 feet apart. Drilling through the FRP is easy using a standard twist drill suitable for wood or metal. Countersinking is not required. If you need to cut the FRP product, a good quality abrasive disc, jigsaw or hacksaw can be used. The FRP material is quite tough to cut by hand, so if power tools are not readily available, please ask about our cut to size service.
Screw Size Guide:
- To timber: No.8 x 30mm zinc plated or stainless steel screws.
- To steel plate: No.8 x 20mm self-tapping pan head stainless steel screws or No.8 x 20mm self drilling pan head Philips zinc plated screws.
- To concrete: No.8 x 30mm zinc plated or stainless steel impact anchors.
- To open mesh: Stainless steel or zinc plated saddle clips and domed head bolts suitable in length for the depth of the existing treads.
Application: Preposition the piece of GRP in place to ensure the fit. Trim if needed. Install screws about 6 inches from the ends of the piece, then additional screws every 2 feet as needed. Pre-drill the FRP to the proper hole size for the screws being used. Drill holes approximately 2" in from each edge and thereafter at approximately 12-16" intervals